

Kingspan Kooltherm K17 Insulated PlasterboardR1.15 | 35.0 mm
Kingspan Kooltherm K17 - Insulated Plasterboard
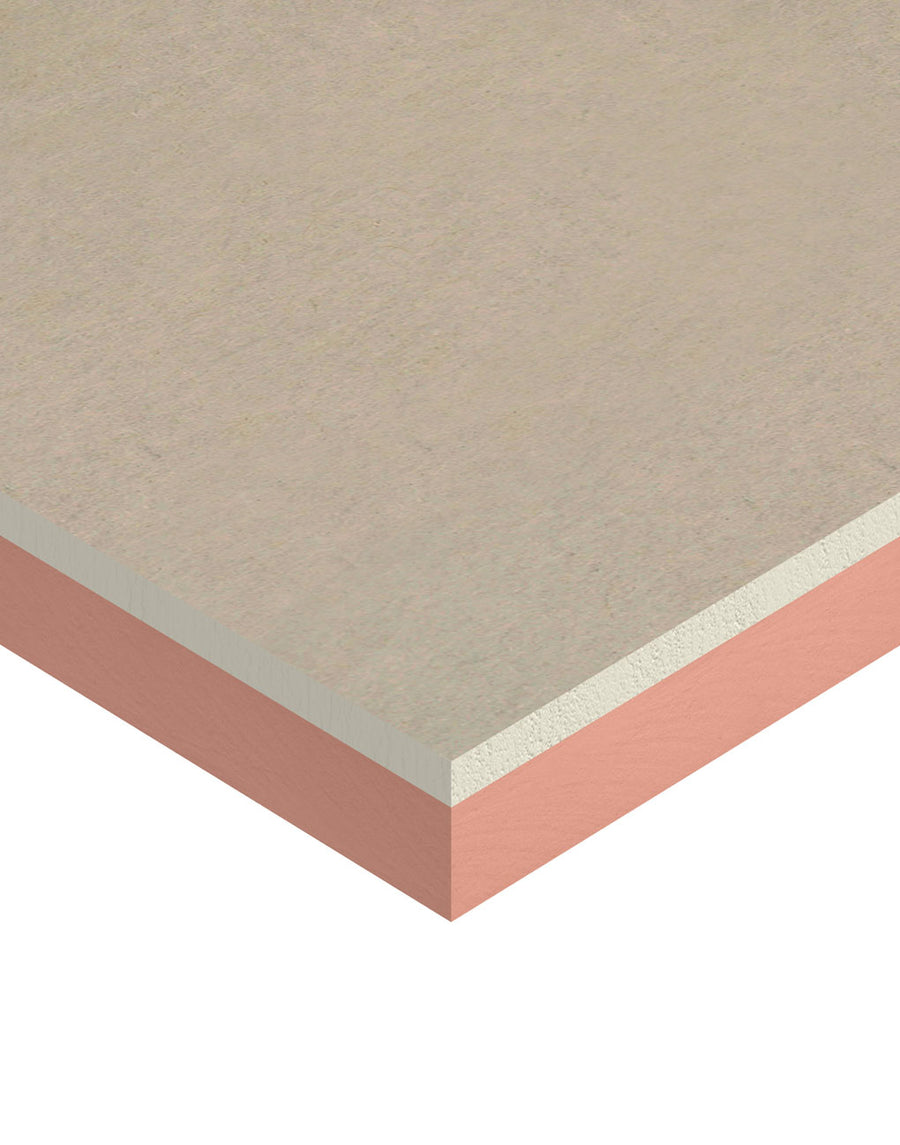
Kingspan Kooltherm K17 Insulated Plasterboard is a fibre-free rigid thermoset, closed cell phenolic insulation, sandwiched between a front facing of tapered edge gypsum based plasterboard, and a reverse tissue based facing adhesively bonded to the insulation core during manufacture. Kingspan is renowned among plasterboard suppliers for it’s superbly insulated thermal plasterboard sheets. Alternative lining boards, such as fibre cement sheets, can also be bonded to the insulation core to create customised finishes and facings in our Kingspan Kooltherm K17 + Insulated Lining Board range.K17 Plasterboard Features
- Australian Made
- CodeMark certified for NCC compliance
- NCC and AS/NZS 4859.1:2018 compliant
- Global GreenTag GreenRate-certified
- Also used for residential & modular construction
- Fire-free, closed cell insulation core
- 3-in-1 insulation, dry lining and vapour control
Product Description and Durability
If correctly applied, Kingspan Kooltherm® products can be expected to have a long life of service. Their durability depends on the supporting structure and the conditions of its use. Kingspan Kooltherm® products are warranted for a period of 10 years for both residential and commercial installations. This is subject to the terms of the complete Kingspan Kooltherm® warranty document. Kingspan Kooltherm K17 Insulated Plasterboard has a gypsum plasterboard face. It should, therefore, not be used to isolate dampness nor be used in continuously damp or humid conditions. This product can be applied utilising a variety of traditional or modern dry-lining techniques, to dry and structurally sound walls. These include the construction adhesive bonding method. The particular system employed will depend on the construction or design of the wall to which Kingspan Kooltherm K17 Insulated Plasterboard is to be fixed. If an acceptable adhesive bond cannot be achieved due to the wall surface, consideration should be given to a mechanically fixed option. The tapered edge to the plasterboard enables a flat seamless surface equal to traditional plaster finishes after the correct jointing procedures as per plasterboard manufacturer’s recommendation have been completed.Construction Adhesive Bonding
This method is for application to brick, block or concrete masonry cavity walls which are free from moisture penetration.- Ensure that the wall surface to be bonded to is free from oil, grease, paint, release agent, or any contaminate that may affect the bond of the adhesive to the wall.
- Gun apply a continuous blob of construction adhesive around perimeter wall and ceiling junctions, and around any openings, such as windows and doors, in order to provide a seal.
- Gun apply blobs of construction adhesive to the wall or the back of the board approximately 25 mm in diameter (single squeeze), at 300 mm centres in both directions or to specific adhesive manufacturer’s instructions. Ensure that the blobs adjacent to a board joint are approximately 25 mm in from the edge to avoid bridging the joint.
- Tap the board back firmly using a straightedge, ensuring that the vertical edge is plumb.
- Continue dry lining in the same manner.
- Provide temporary mechanical support to the Kingspan Kooltherm K17 Insulated Plasterboard for at least 24 hours.
- Mechanical fixings are recommended to complement the adhesive bond. Apply 2 per board after the adhesive has set, positioned 15 mm in from the board edge and at mid height with a nominal 25 mm embedment into the wall. (Refer to fixing manufacturer instructions for more information).
- It is recommended that mechanical fixings are positioned in the tapered edge of the boards so that they are covered when the board is finished, (e.g. joints taped and skim coating) at mid height. Boards should be fitted tight to the ceiling/joists
Handling, Storage and Installation of Insulation Panels
The packaging of Kingspan Kooltherm® should not be considered adequate for long term outdoor protection. Ideally boards should be stored inside a building. If, however, outdoor storage cannot be avoided then the boards should be stacked clear of the ground and covered with an opaque polythene sheet or weatherproof tarpaulin. Boards that have been allowed to get wet should not be used. The insulation core is resistant to short–term contact with petrol and with most dilute acids, alkalis and mineral oils. However, it is recommended that any spills be cleaned off fully before the boards are installed. Ensure that safe methods of cleaning are used, as recommended by suppliers of the spilt liquid. The insulation core is not resistant to some solvent-based adhesive systems, particularly those containing methyl ethyl ketone. Adhesives containing such solvents should not be used in association with this product. Damaged boards or boards that have been in contact with harsh solvents or acids should not be used. Kingspan panels are chemically inert and safe to use. Cutting should be carried out either by using a fine toothed saw, or by using a sharp knife to cut through the insulation and paper backing of the plasterboard, then snapping the board face down over a straight edge and cutting the paper facing of the plasterboard on the other side. Ensure accurate trimming to achieve close butting joints and continuity of insulation.Request a quote
Kingspan Kooltherm K17 Insulated Plasterboard
Thanks, your request is on its way.
We’ll get back to you with pricing within 4 business hours.
Insulation Installation - Do It Yourself
Many homeowners choose to install their own insulation. Done properly, it can be a rewarding DIY project that makes your home more comfortable and energy efficient. To get the best results, it’s important to install insulation batts correctly. Otherwise, their performance can be reduced by up to 50%. If you choose to take on the home insulation installation yourself, we strongly recommend that you familiarise yourself with the proper process. Make sure you check the relevant standards prior to commencing the installation.
Using a sharp knife, and a thin plank of wood as a guide, can make cutting insulation batts easier. Experienced insulation installers will often size up the cut with a glance and press the insulation against a vertical timber wall stud before cutting the batt to the desired width or length. This can save time, but care must be taken to ensure that you keep the knife blade well clear of any wiring or other appliances.
General install tips
DIY Install Tips for Beginners
The following principles of installing insulation will ensure the best possible performance from home insulation.
- Avoid gaps in insulation
- Do not compress bulk home insulation
- Allow clearance around appliances and fittings
- Protect your home insulation from contact with moisture
- Use a broom handle with a nail in the end to access hard to reach areas
- Provide vapour and moisture barriers to prevent condensation
Improve the Thermal Performance of Home Insulation
- Fit batts snugly leaving no gaps around ducts and pipes
- Make sure corners, junctions of wall-floor-ceiling are fully covered
- Isolate metal framing from contact with cladding
- Insulate window frames or install windows with thermal breaks
Home Insulation Clearance Requirements
Some appliances and fittings, such as recessed downlights and heater flues, require free space around them for the dissipation of heat, to reduce fire hazard. Insulation should not be placed against these fixtures.
- Recessed downlights – Minimum clearance of 25mm
- Flues and exhaust fans – Minimum clearance of 25mm
- Electrical wiring – Keep wiring clear of insulation (check with electrician before installing insulation)
Condensation
Home insulation, correctly installed, can keep the interior surface temperature of ceilings and external walls above the dewpoint, preventing condensation on these surfaces. Condensation control involves preventing moist air from coming into contact with cold surfaces below the dewpoint of the air by one or more of the following means:
- Good ventilation of the moisture-laden air.
- Insulation to keep ceiling and wall temperatures above dewpoint.
- Heating to prevent indoor surfaces from cooling below the dewpoint.
Protect Insulation from Contact with Moisture
Masonry walls are not waterproof. In both brick veneer and double-brick wall construction a cavity between the external masonry wall and the internal lining keeps the internal lining dry. Moisture on the internal face of the external masonry wall can drain away through weepholes or evaporate into the cavity.
- Brick veneer construction – make sure the insulation remains within the frame. Use reflective foil, galvanized wire or building paper to keep the bulk insulation in place.
- Cavity masonry walls – restrain bulk insulation to maintain at least 30mm cavity.
- Existing wall cavities – use ‘cavity fill’ water-repellent loose-fill granular rockwool insulation. This material contains a water repelling agent to prevent absorption of moisture.
Sealed Air Space with Reflective Foil
- Reflective insulation adjacent to a solid surface without an airspace, has no insulative value and acts only as a vapour barrier. To add thermal resistance, reflective insulation must face a sealed air space.
- Maintain a sealed air space of at least 25 mm.
- Eliminate air movement between air spaces on either side of the foil.
- Overlap sheets by 150 mm and tape over joins; seal any gaps.
- Use face-of-wall brick ties instead of ties which penetrate the foil.
- Reflective surfaces should be kept clean and dust free, vertical installation is best for this.
Insulation Installation – Clearance Around Appliances and Fittings
Caution When Using Foil Products
- Keep foil products away from electrical power outlets or lights as they can conduct electricity through the aluminium metal reflective covering.
- Care must also be taken when installing under metal or tile roofs.
Wear Protective Clothing Before You Insulate
- When installing insulation in the roof space, it’s recommended to wear goggles, a dust mask, gloves, long pants and a long sleeve shirt.
Install instructions
How to install ceiling insulation
Do not start work until the site is safe!
Insulation batts installation - all work must be completed to the requirements of relevant standard: AS3999:1992
Step 1
- Ensure you have the right product for the application for your roof insulation installation. Check that you have the correct R-Value required on the drawings/plans.
- Check the joist width to determine the correct insulation batt width. (e.g. 430mm or 580mm)
Start from the furthest point, ensuring the top plate (top of the wall) is covered and work back towards the access hatch of the ceiling. - When installing, energise each batt by giving it a light shake and gently bouncing it on its side, to help the batt expand to the thickness specified on the label. Remember: the best house insulation performance will be achieved by following the manufacturers guidelines.
Step 2
- The insulation may be trimmed to appropriate sizes if required.
- Make sure when installing roof insulation that you leave sufficient clearances around recessed lights, extractor fans, chimney elements and piping as appropriate.
- Where possible, place insulation under electrical cables and ductwork.
- Use any off-cuts to fill voids.
- Glue or fix insulation to the back of the access lid or hatch.
Step 3
- Always make sure your insulation has a snug fit, with a uniform finished height of insulation. Check tips and tricks for good techniques in achieving this.
Step 4
- Once you have completed installing your home insulation, make sure you keep a copy of the product specification together with the documentation of your house.
How to install wall insulation
Do not commence installing insulation until the site is safe!
Installation must be completed to the requirements of relevant standard: AS3999-1992
Step 1
- Ensure you have the right product for the application. Check that you have the correct R-Value required on the drawings/plans.
- Check the joist width to determine the correct insulation batt width. (e.g. 430mm or 580mm)
Work progressively around the perimeter of the building/room. - When installing, energise each batt by giving it a light shake and gently bouncing it on its side, to help the batt expand to the thickness specified on the label.
Step 2
- The insulation may be trimmed to appropriate sizes if required. When cutting* to fill a void, oversize by around 10mm to ensure a snug fit. Do not leave folds or compress the insulation material.
- Fill gaps around lintels, double framing, windows and doors with off-cuts.
- Trim and place product around vents to allow ventilation systems to operate as intended.
- Shape and fit insulation behind electrical wiring and plumbing work.
- Use string to hold in place (if required).
- Ensure insulation does not protrude beyond the line of the studs.
Step 3
- Always make sure your insulation has a snug fit, with a uniform finished height. Check tips and tricks for good techniques in achieving this.
Step 4
- Once you have completed your insulation installation make sure you keep a copy of the product specification with the documentation of your house.
How to install underfloor insulation
Do not start work until the site is safe!
Insulation installation must be completed to the requirements of relevant standard: AS3999:1992
Step 1
- Ensure you have the right product for the application. Check that you have the correct R-Value required on the drawings/plans.
- Check the joist width to determine the correct insulation batt width. (e.g. 430mm or 580mm)
The insulation should always be fitted with strapping. - If fitted to fold down the fold should be no more that 75mm below the bottom of the product.
- Start from the furthest point ensuring the bottom plate is covered and work back towards the access entrance of the underfloor.
- When installing, energise each batt by giving it a light shake and gently bouncing it on its side, to help the batt expand to the thickness specified on the label.
Step 2
- The insulation may be trimmed to appropriate sizes if required.
- Install the insulation in accordance with AS3999:1992, ensuring appropriate clearances from recessed lights, plumbing, extractor fans, chimney elements and piping.
- Refer to relevant standard for guidance regarding placement of insulation and stapling around electrical wiring.
- EXTREME CAUTION REQUIRED. If insulation is covering any wires, apply the Electrical Hazard labels at that point
Step 3
- Place long edge side of the insulation first neatly into the joist/underside of floor intersection
- Pressure fit the body of the insulation flush up under the floor
- Fold the opposite edge down so that a snug fit is achieved
- Leave no gaps between the insulation and the framing and the underside of the floor
- Fix strapping across the underside of the insulation batt
- Each insulation batt should have three runs of strapping applied, one at approx. 100mm from each end and one diagonal or across the centre of the insulation batt.
- Always ensure the insulation has a snug fit. Refer to the tips and tricks for techniques to reach tight spaces.
Step 4
- Once you have finished installing the insulation make sure you keep a copy of the product specification with the documentation of your house.
Top tips and tricks
Preload the ceiling before plastering
If you are building a new home it is a good idea to get the insulation above the ceiling before the roof space is enclosed.
For hard to reach areas, use a broom handle with a nail through the tip to spike the batt and position it.
You need ventilation while you work. If the roof is tiled, kick back some tiles for ventilation.
Try to avoid installing on a hot day, but if you are start nice and early and drink plenty of water throughout the day.
Use thick plywood or a wooden plank to support yourself over the ceiling rafters. This is more comfortable for your knees than kneeling on the rafters.
Knauf Insulation Earthwool Insulation is a new generation of softer, safer and more environmentally friendly glasswool insulation specifically designed for DIY installation.
Install guides for this product are below. Need a hand? Call 1300 729 639.
We deliver to homes and building sites right across Australia. Choose your preferred delivery date at the online checkout and we'll confirm the same business day.
Full delivery & pickup info →Answer a few quick questions, or describe your job in your own words, and wAIse checks whether this R1.15 product fits and compares it with two alternatives.
We collect verified reviews on Trustpilot across all our products and service.
Read all on Trustpilot →Similar options for this application, compared on price per m² and R-value.
Knauf Earthwool Ceiling Insulation Batts
- Choose from R3 to R8, from temperate climates up to cold-climate performance
- Softer to handle than standard glasswool, thanks to the ECOSE bio-based binder
Knauf Earthwool Sound Shield Insulation Batts
- Available from R2 to R3.1 to suit different climates
- Softer to handle than standard glasswool, thanks to the ECOSE bio-based binder
48kg/m³ Autex GreenStuf Polyester Acoustic Blanket (AAB)
- Non-itch and safe to handle, so no gloves or mask needed and great for DIY
- Excellent sound absorption (NRC 0.90), absorbing almost all sound in the cavity to cut noise transfer
Foilboard Green Rigid Insulation Panels
- Wall options from R0.26 to R1.3 to match your comfort target
- Fire-resistant and suited to fire-rated systems